How to Make Sushi Rice for chirashi sushi!

The Michelin starred sushi chef taught us this recipe for the sushi rice of chirashi sushi, serving about 2 to 3 adults.

He gave out his hidden recipe, something that only a sushi chef can think of, and something you don’t see in those classic recipes. First, it might be hard to get at places like a supermarket, but he was telling us that using cane sugar (三温糖) and salt from burning seaweed (藻塩) would give great depth of flavor to sushi rice. If you can’t find them, regular sugar and salt for cooking will do. In addition to that, sushi vinegar on the market already contains sugar, salt and more, so make sure to get komezu (rice vinegar).

And if you would like to make it similar to the taste of a sushi restaurant, obtain Japanese short-grain rice, Koshihikari (コシヒカリ). Along with that, water for cooking rice should be Mineral water as well as soft water. Concentrations of dissolved calcium and magnesium in 1000 ml of water are indicated in numbers called “hardness”. By WHO standards, hardness below 120 mg/l is considered soft water. If you can’t find it, try to choose Mineral water with the number as small as possible.

(Ingredients)

Rice:360cc

Komezu (rice vinegar):3 tbsp and 2 tsp

Cane sugar:1 tbsp

Salt:1 tsp and 1/2 tsp of which 1/2 tsp should be Salt from burning seaweed (Moshio)

Mineral water:340~350cc


The following are tips about cooking sushi rice.

  1. Place the rice into a bowl and pour Mineral water, and then mix it lightly. Leave it for about 10 minutes and let the rice soak in the water.
  2. Wash the rice like swirling it gently, trying not to damage the surface of each grain of rice.
  3. After the rice is rinsed twice, transfer it into a strainer once and drain until it becomes whitish (about 30 minutes), and then it will be ready to cook.
  4. Cook rice with the amount of water 2 mm under the mark indicated by the rice cooker.
  5. Once the rice is cooked, let it steam for 10 minutes.
  6. While the rice is cooking, prepare awasezu by combining komezu, cane sugar, salt, and salt from burning seaweed and mixing thoroughly.
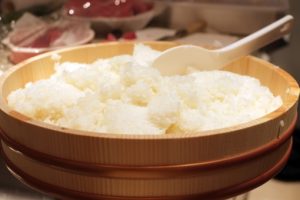
  7. Spread the rice on handai (飯台) or a tray, and distribute awasezu over shamoji (rice paddle) evenly over the rice.
  8. Use a slashing motion with shamoji and spread out sushi rice all over the tray.
  9. Cooldown the surface of sushi rice by fanning, as a guide, to the temperature you could feel the warmth slightly when you put your hands above the rice.
  10. To cool down the bottom of the sushi rice as well, flip the sushi rice with shamoji.
  11. Once the sushi rice is done, cover it with a damp kitchen towel. Don’t use plastic wrap. If you don’t have a damp kitchen towel, use a damp paper towel.
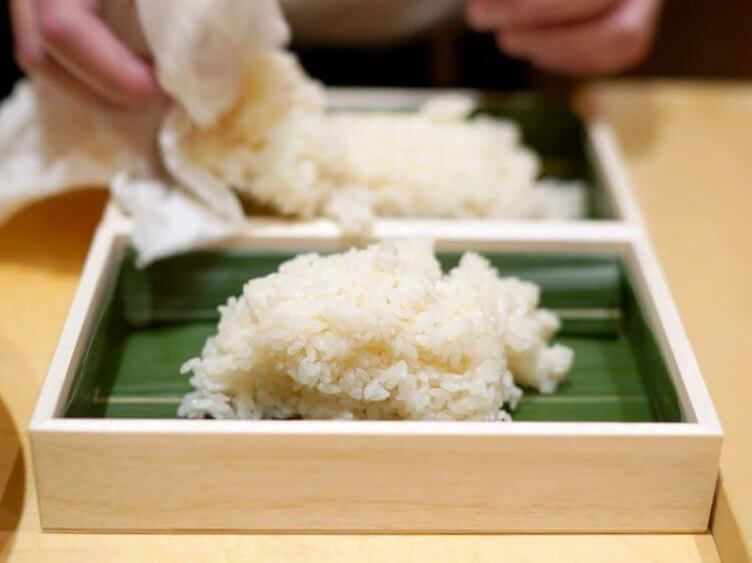
  12. When you make chirashi sushi, don’t push the sushi rice too hard to squeeze in a container. Try to put it in softly as if letting the air in.
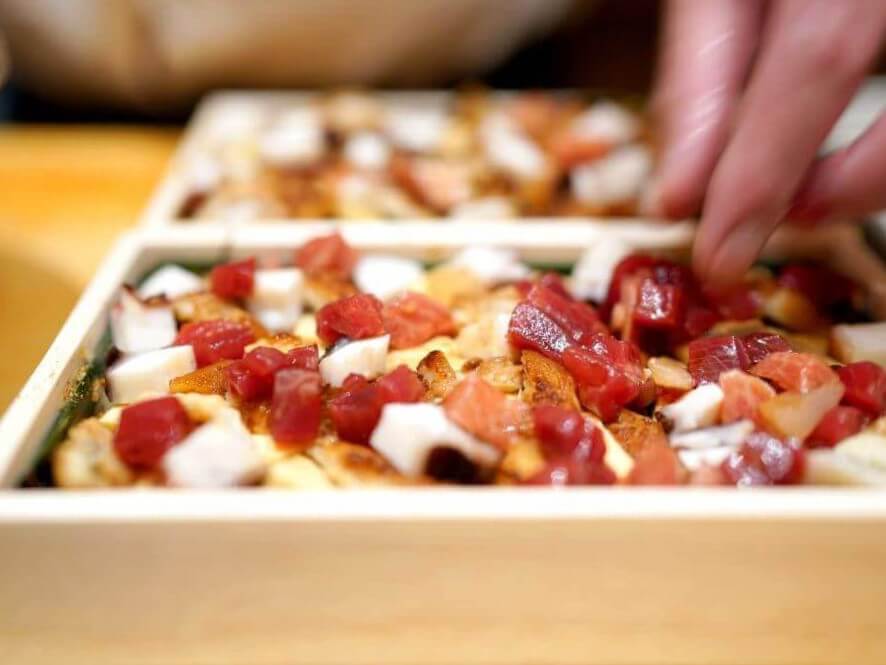
  13. At last, decorate toppings as you like. Use soy sauce on seafood to your liking.

We consider these extra efforts make a big effect on your result. Unique to the sushi chef, please try and follow the recipe as much as you can.

Related contents:
WHAT RICE TO USE FOR SUSHI?

TYPES OF VINEGAR

Apply

We hope this information will be helpful.

Revision date: October 29, 2021


Share this article

What is Kakushiaji?

Kakushiaji refers to a technique where a single seasoning (For example, sugar, vinegar, soy sauce, salt, etc.) is added to a dish. The Kakushiaji contrasts with the finished dish’s flavor, and is added in an amount too small to notice when served. This produces a clear improvement in flavor.

Examples include adding a little salt to heighten sweetness, or adding a little vinegar to a simmered dish. Sometimes these combination of flavors can be quite surprising, like adding a touch of chocolate to a curry.

Apply

We hope this information will be helpful.

Revision date: November 7, 2018


Share this article

What is “Sute-shari”?

Shari (vinegared rice or sushi rice) used for making sushi is kept in a rice tub and normally placed by the hand the chef uses to shape the rice. The chef places his shaping hand in the tub and takes out several hundred grains of rice. It is said that a skilled chef can consistently grab the same number of grains with an error of only a few grains, every time. This is the result of many years of training.

If the chef lacks such training, they may take too much shari and you’ll see them return some to the rice tub. This is called “sute-shari (捨てシャリ)” or “discarded shari”. This sute-shari is not a very appealing sight. But the reality is that even the world-famous Jiro* can be seen discarding shari in this way.

*Jiro Ono is the owner of Sukiyabashi Jiro, a sushi restaurant in Ginza that has earned the status of three Michelin stars for 12 consecutive years.

Related contents: WHAT RICE TO USE FOR SUSHI?

Apply

We hope this information will be helpful.

Revision date: May 14, 2018


Share this article

Why doesn’t rice stick to the sushi chef’s hands?

One of the pleasures of sitting at a sushi counter is watching the sushi master work his craft.

He holds the topping between the index finger and thumb of his left hand while simultaneously grabbing the shari (vinegar rice) with his left hand. He gently squeezes the shari and then moves the topping from his left hand to the top of that shari in a fluid motion. This entire process of shaping the shari to the finished piece of sushi takes less than six seconds. Every movement is precise and purposeful.

However, no matter how many pieces the chef makes one after another, you’ll never see a grain of rice stick to his hands. If you or I were to make even one piece of sushi, our hands would be covered in rice. So why doesn’t it happen to them? Their hands don’t look oiled. Perhaps sushi chefs have especially smooth or slick hands compared to us average Joes?

Of course not. This is actually thanks to the vinegar.

The chefs keep a bowl of vinegar close by, which they constantly use to wet their hands. This procedure is called “Tezu” or vinegared water, which both disinfects the hands and cools their palms. When the vinegar evaporates, it takes the heat from the hands with it.

Normally hands reach temperatures of 33-34 degrees Celsius (91-93 degrees Fahrenheit), but sushi chefs cool their hands to approximately 30 degrees Celsius (86 F). This transfers the heat from the hands to the shari, keeping it from getting sticky. In other words, not a single grain of rice sticks to their hands.

Apply

We hope this information will be helpful.

Revision date: March 19, 2018


Share this article

Prior to WWII, there were chefs whose only job was making vinegar rice!

From the end of the Edo period through the Meiji period, rice was cooked using firewood and a pot. It is not easy to get the fire at the right temperature and the rice has to be cooked to the same texture regardless of where it came from or the size of the grains, so at the time the task required a skilled chef. Therefore, there were “Shari-ya” employed by sushi restaurants who specialized in cooking rice. “Shari-ya” focused on this single task and were not involved in the actual making of the sushi after the rice was passed on to the chefs.

Related contents:
TYPES OF VINEGAR

WHAT RICE TO USE FOR SUSHI?

Apply

We hope this information will be helpful.

Revision date: January 29, 2018


Share this article

How to make sushi rice for Nigiri sushi by a sushi master

The real way of making sushi rice for Nigiri sushi by a sushi master. There are 4 tips!

In order to bring sushi to life, it is extremely important how sushi rice (shari or vinegared rice) is made. Let me introduce a cooking method, a top grade sushi master uses.

First, wash the rice gently. Leave it to soak for about half an hour and let it fully absorb water. The most important point here is to keep the water level which includes the rice consistent (The first tip).

The rice should be cooked with water with a ratio of 10 to 9. A little less water than the regular rice, so that it is cooked slightly hard. This is the second tip.

While you wait for the rice to cook, make awasezu* by adding salt and sugar in vinegar. Also, set up hangiri (rice-cooling tub) for mixing the rice. Don’t forget to wipe the inside with a wet kitchen towel to prevent the rice from sticking to it.

Once the rice has finished cooking, leave it to steam for about 15 minutes and dump it out into hangiri. Pour awasezu immediately and let it sit for 30 seconds or so. Because the rice absorbs vinegar only while it is hot, managing this process quickly is the third tip.

After letting it sit for 30 seconds, spread the rice out with shamoji (rice spatula) as if cutting it down. Make sure that vinegar goes around using a cutting motion vertically. Additionally, fan the rice using a uchiwa (fan) to remove the moisture of vinegar and mix the rice with a cutting motion horizontally this time. Fanning with uchiwa is not to cool down the rice (Do not put the rice in the fridge to cool it down.), but to dry up the excess moisture of vinegar. Moving both hands as you consider it is the fourth tip.

After the rice is vinegared evenly, assemble it in one place and cover it with a damp kitchen towel. In about an hour, it is ready when sushi rice is settled. (Body temperature) Even in a hurry, if you don’t give at least 30 minutes, it won’t help the taste of course, and also won’t make it easy to form the rice for sushi. If you rush at the end, all the delicate attention up to this will be in vain.

*A professional recipe for awasezu is as follows. This is a recipe for short grain rice species such as Koshihikari and Sasanishiki. Slightly sticky rice like calrose is not suitable for sushi rice.

(Ingredients)

Rice:360cc

Water:330 – 340cc

Komezu (Rice vineger):50 – 60cc

Salt:1 tsp – 2 tsp

Sugar:1 tbsp plus 1 tsp – 2 tbsp plus 2 tsp

*If you use Akazu (Red vinegar made from fermented sake lees), add almost no sugar.

Apply

We hope this information will be helpful.

Revision date: September 15, 2022


Share this article

Copy Protected by Chetan's WP-Copyprotect.